SMS Broadcast for Schools and Nursery's

SMS Broadcast is used extensively by Schools and Nursery's; and is a simple and convenient way to keep in touch with both Parents and Staff.
Firstly you will need to login to your Active Inbound Account.
Go to: https://activeinbound.telecomstats.co.uk/
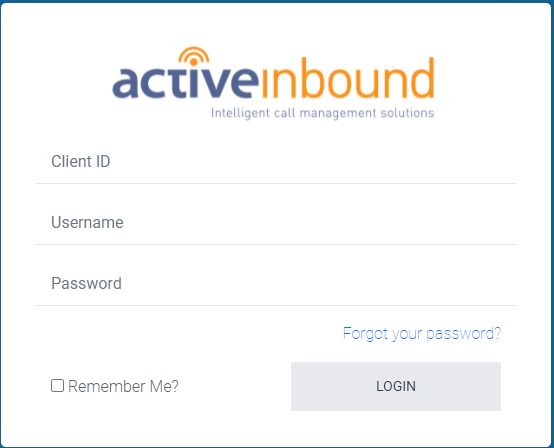
Then enter your Client ID, Username, and Password and select Login.
(If you have forgotten your Login Details please contact your Account Manager or email support@teleproject-uk.com.)
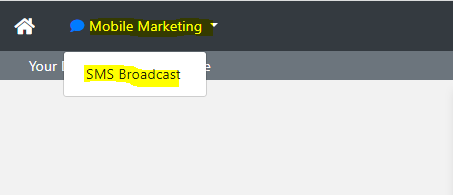
Select Mobile Marketing, then select SMS Broadcast.
Sending a Single SMS Message
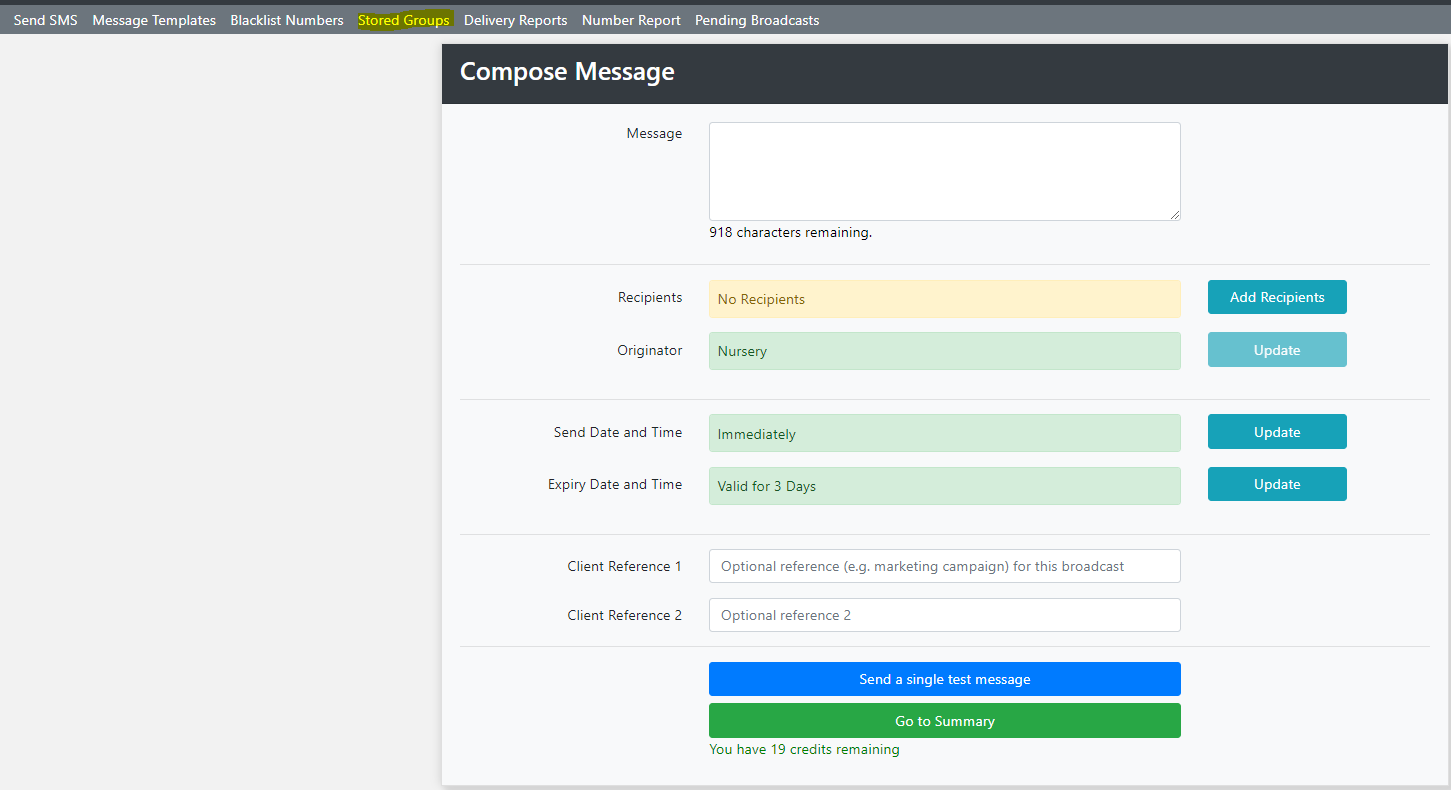
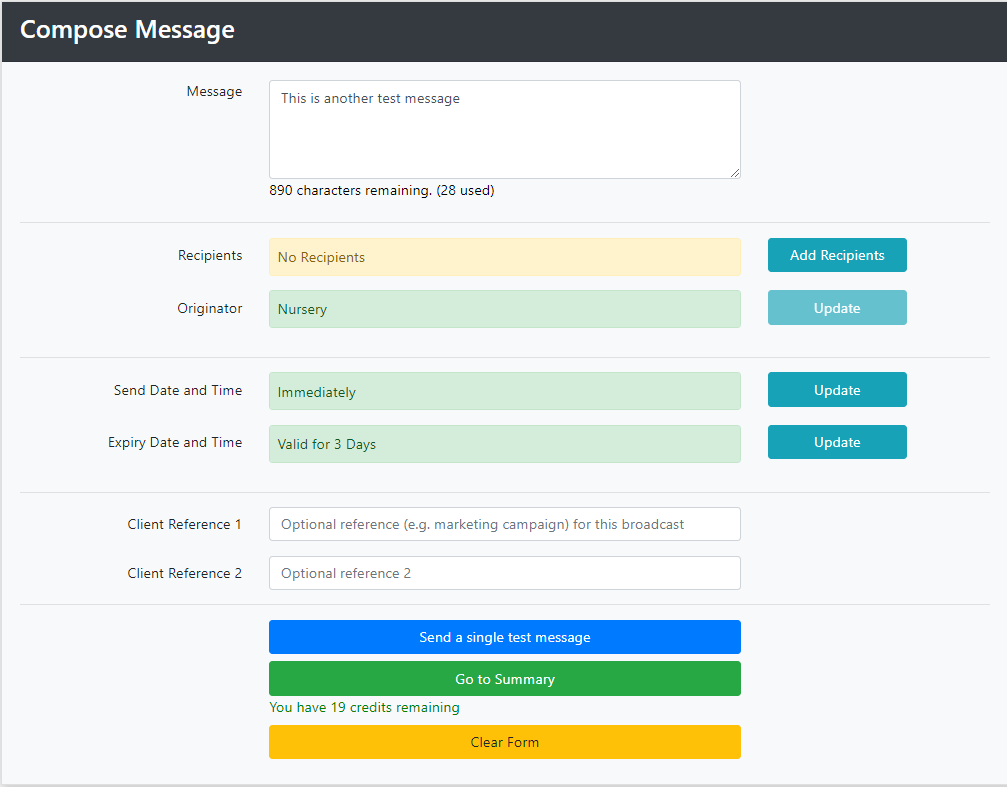
In the message box type the message you would like to send.
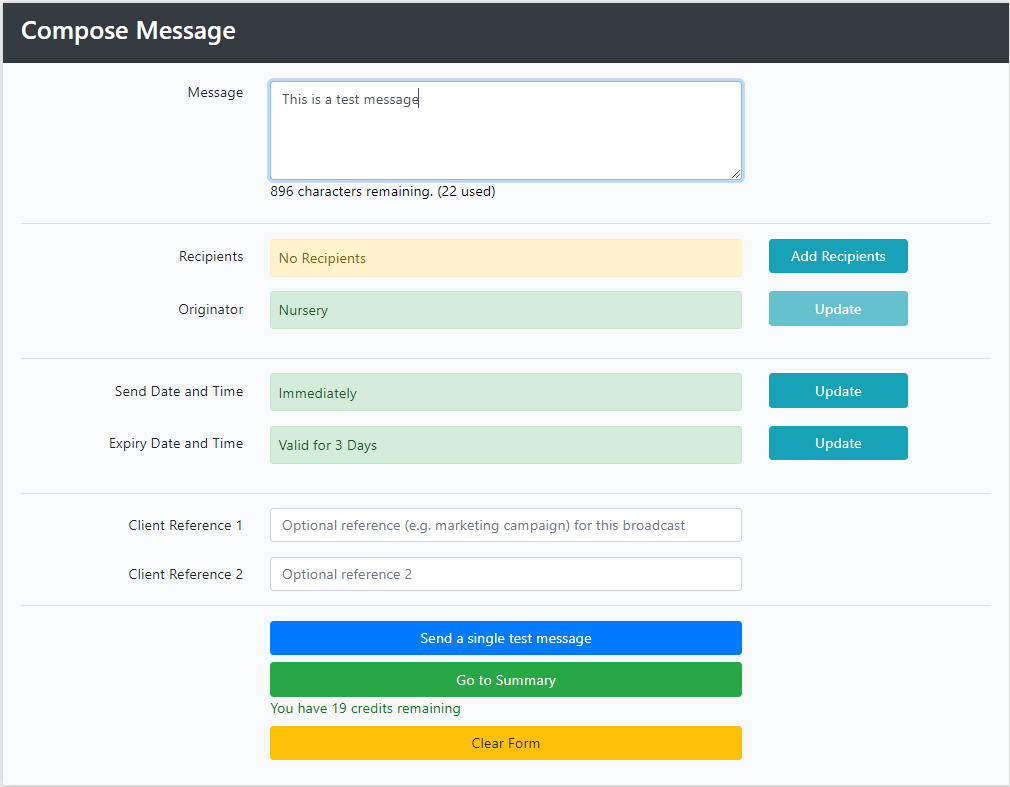
We will now enter the number which we wish to send the message to. Click Recipients, and add the number as detailed below.
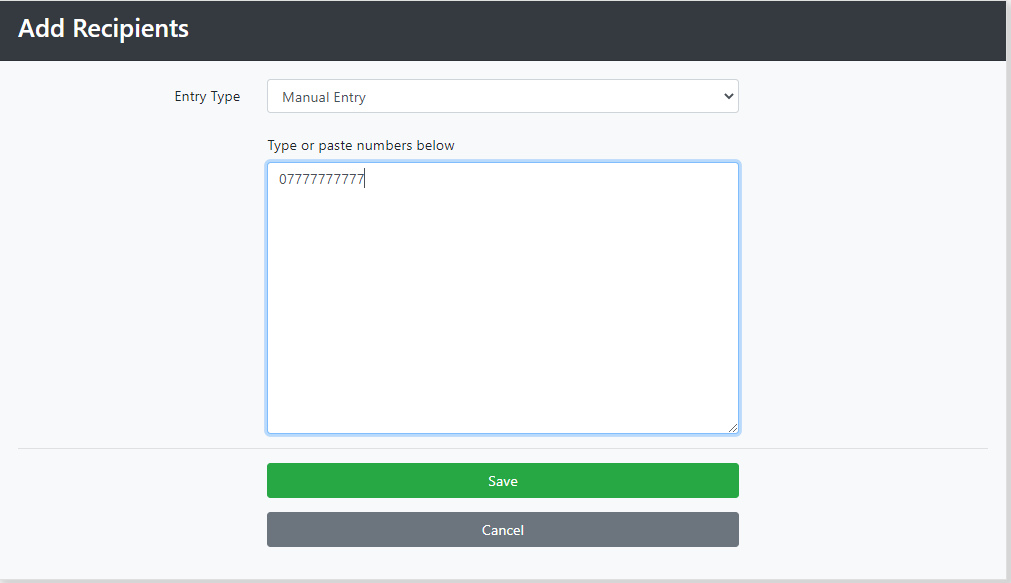
You can add additional recipients by separating the numbers with a comma as follows:
07777777777, 07777777778, 07777777779
When you have finished click Save.
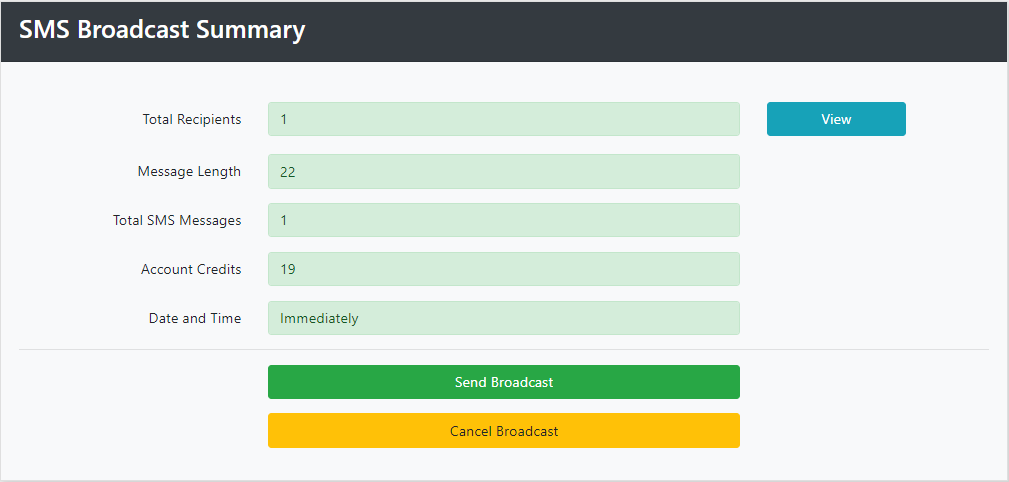
Then Select "Go to Summary"

Then click Send Broadcast to send the message.
Creating a Group
Using the Group feature is the easiest was to send bulk messages to classes or cohorts.
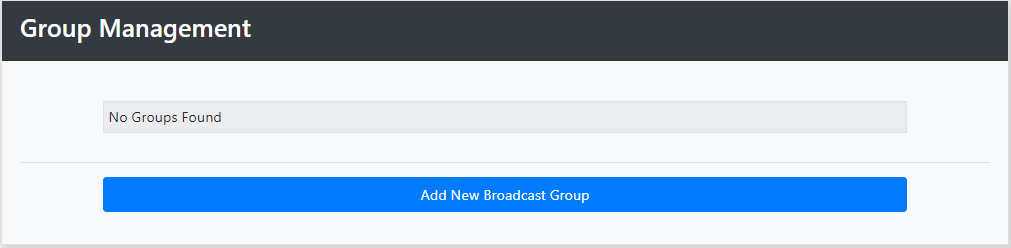
To create a new group select Stored Groups
Select Add New Broadcast Group
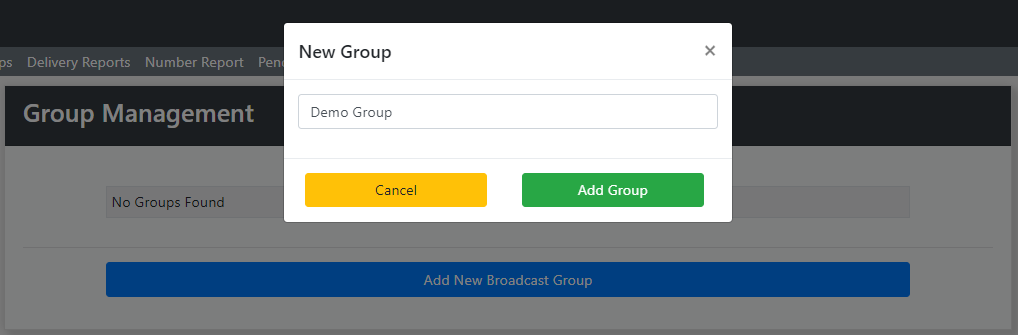
Give the group a name and click Add Group
Now we will add the group members.
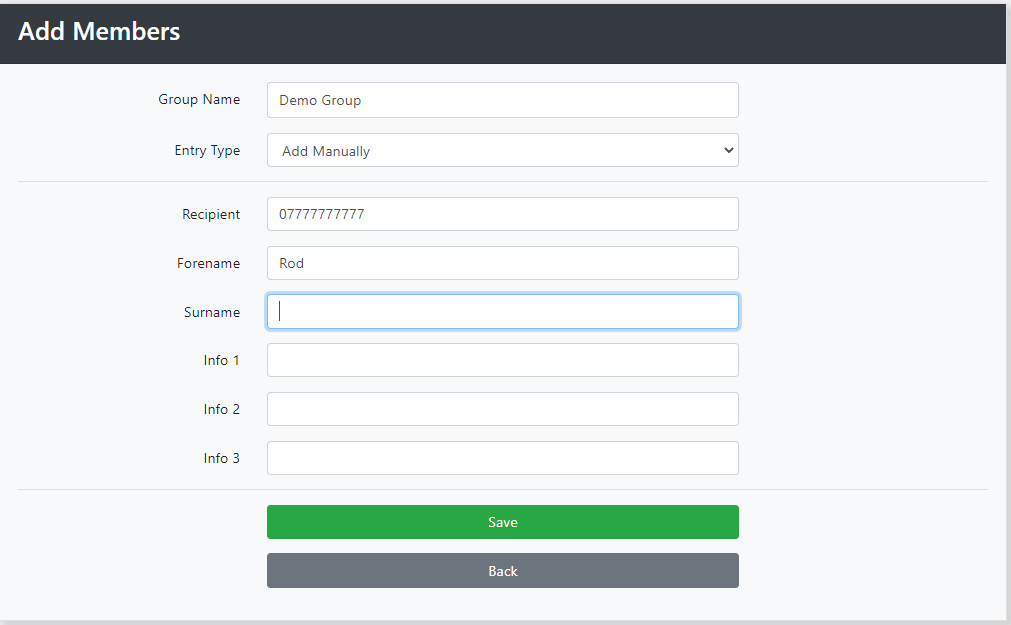
For Entry type select Add Manually from the drop down.
The enter the name and the forename. (Forename is optional.)
The click save.
Repeat this process to add additional members.
You can also upload records from your internal systems and then load the data into a new Group.
First create a new Group following the same steps as detailed above.
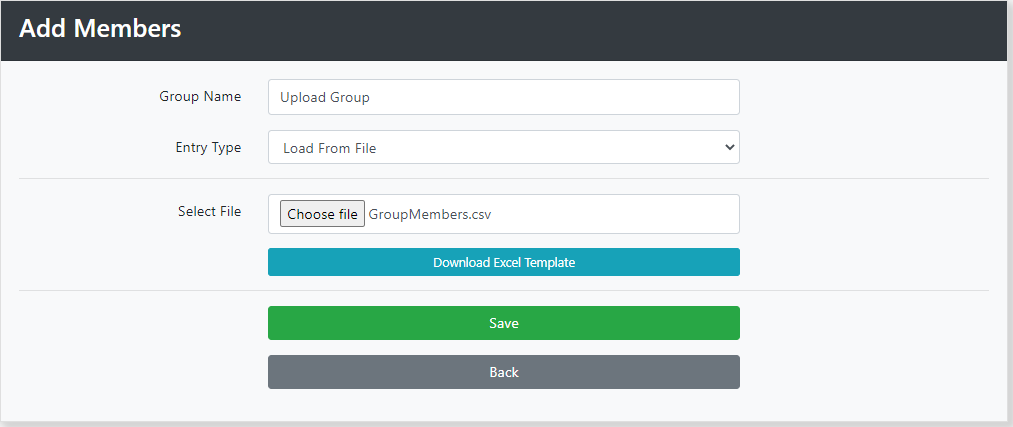
Click Add next to the new Group in this case "Upload Group".
From the Drop menu next to Entry Type select Load from File.
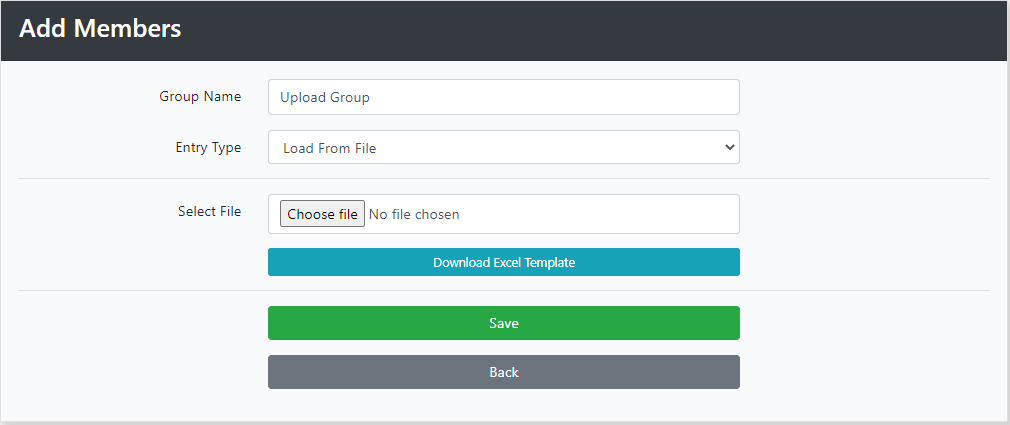
Then click Download Excel Template, and then open the file.
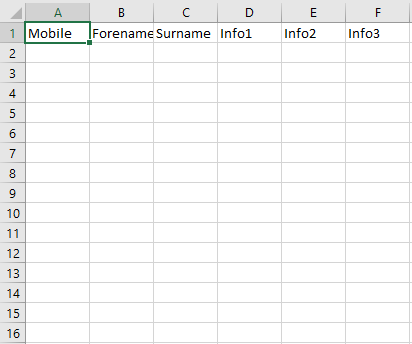
We will now enter some data. You can copy and paste data from your own internal systems. it is important that your data is not formatted in any way; and that there aren't any spaces in the number field.
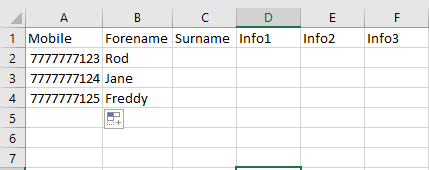
We now have three records.
A few points to note.
The mobile number must be in either or these formats: 07777777123; or 447777777123. (Leading zeros will be automatically removed.)
The other columns are optional, but any additional data included can be used in templates which will be covered later.
Now save the file. It is important that it is in CSV format, NOT excel.
We will now upload the file.
Select your file and click Save.
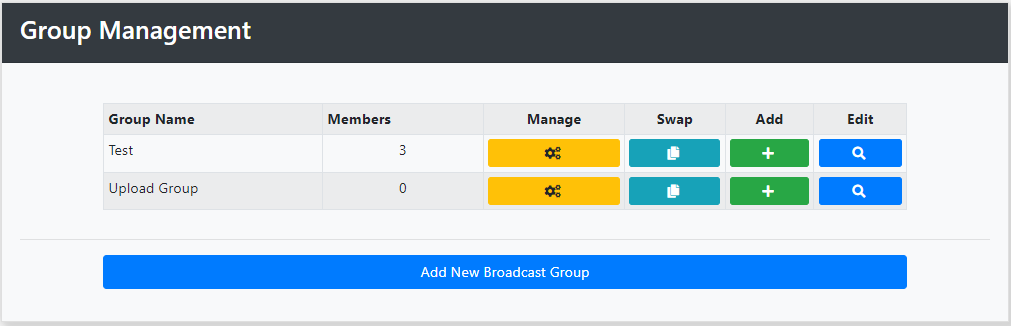
We now have two groups

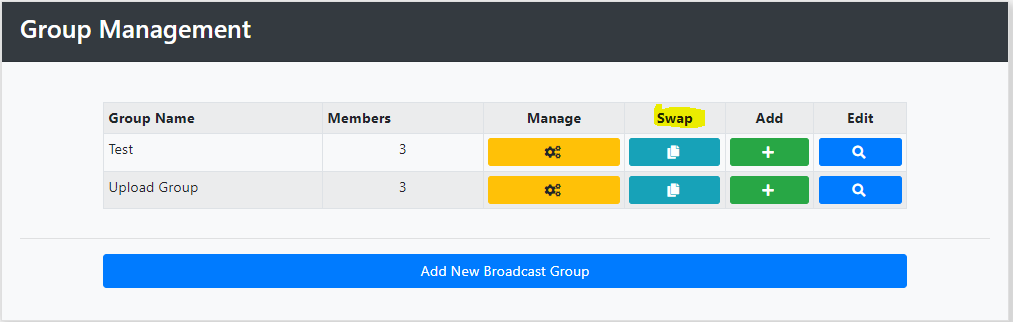
Group Management
We can now edit the groups in several ways.
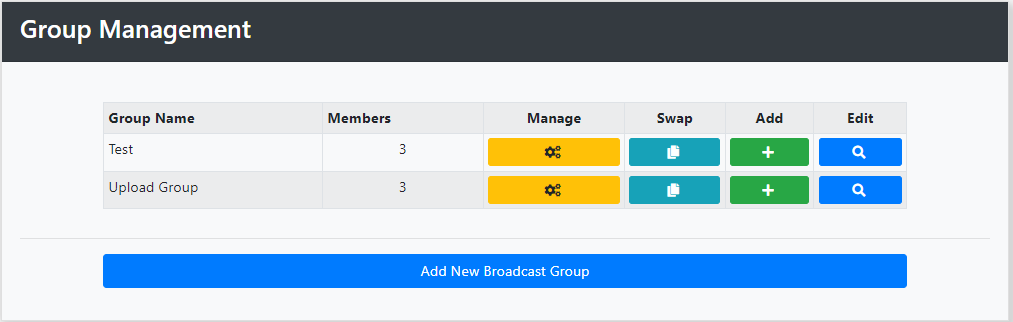
Click on Manage next to the group you wish to edit.
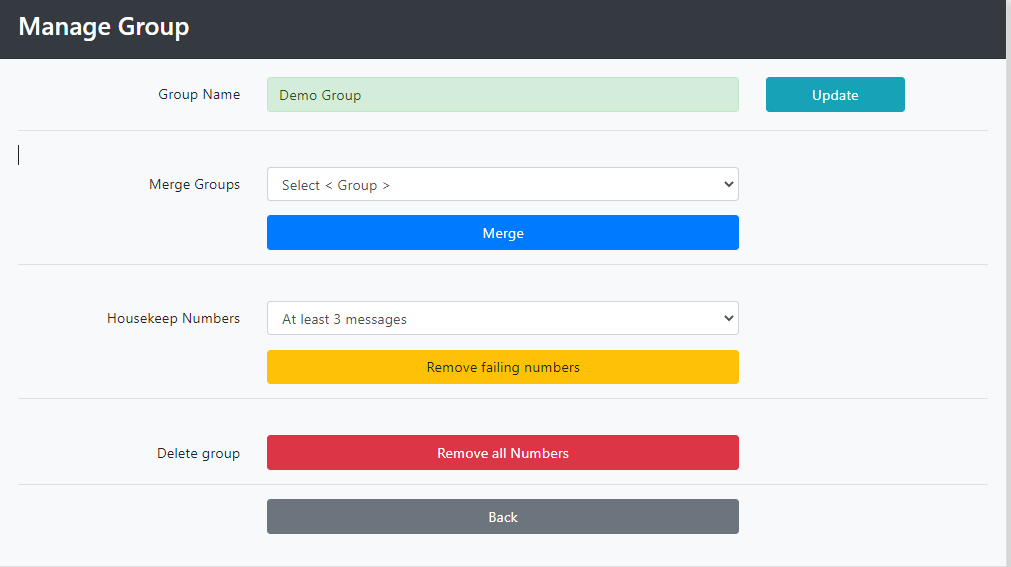
You can change the group name by selecting Update, entering the new name, and clicking save.
If you have more than one group you can merge two groups together. Select the group you wish to merge with from the drop down and select Merge.
You can also remove numbers that fail to send - Click Remove Failing Numbers.
You can delete the group - Click Remove all Numbers.
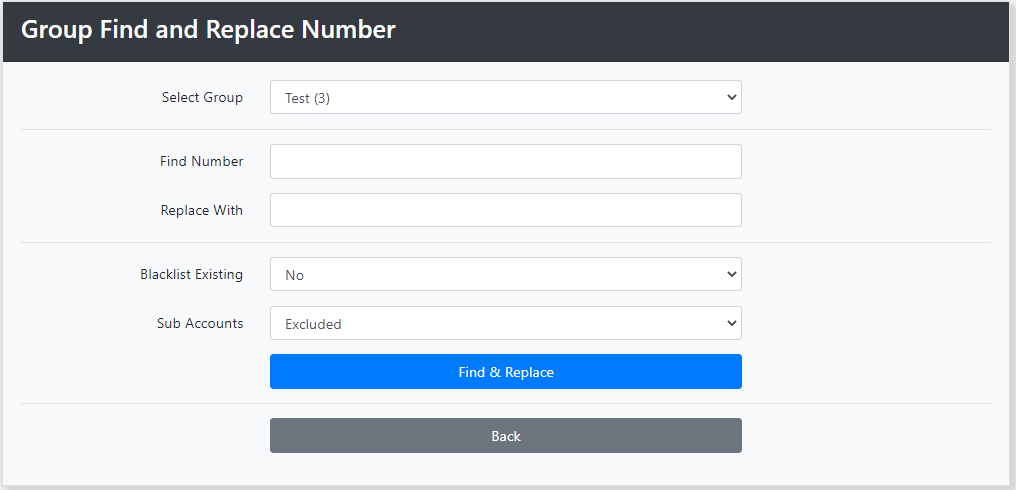
You can also globally change a mobile number.
Go back to Group Management and click Swap.
Select the Group from the drop down. (You can also select All Groups)
In Find Number enter the mobile number you wish to change.
Enter the new number in Replace With.
Then click Find & Replace.
Sending to a Group
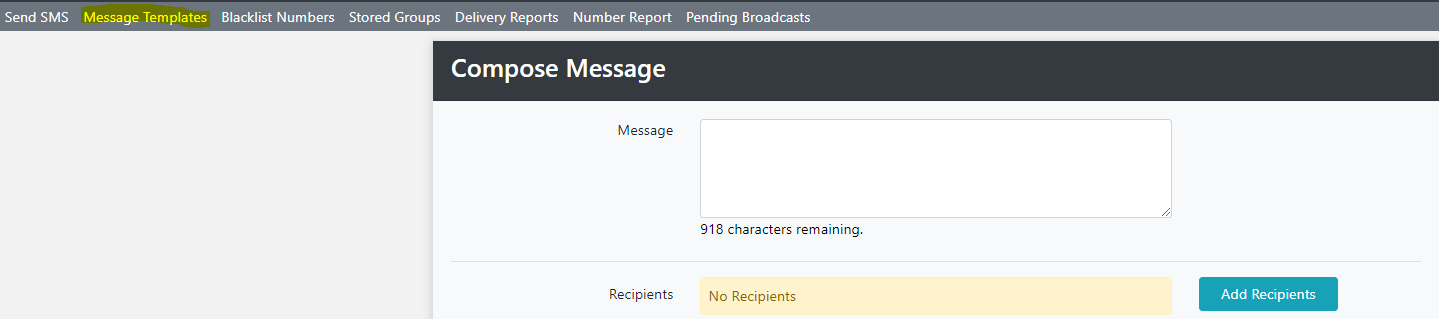
Select Send SMS and compose your message.
Then Select Add Recipients.
From the Entry Type drop down Select Group.
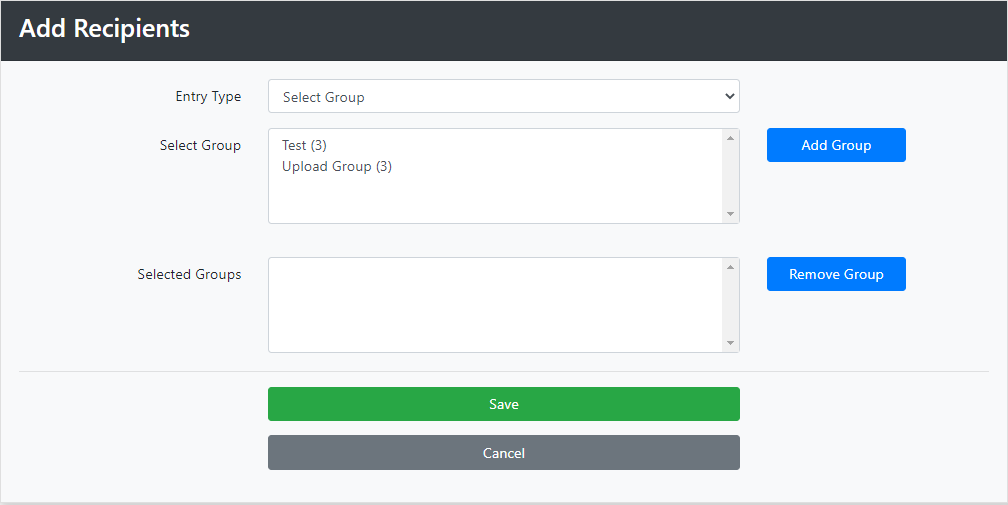
Highlight the group or groups you wish to add and click Add Group.
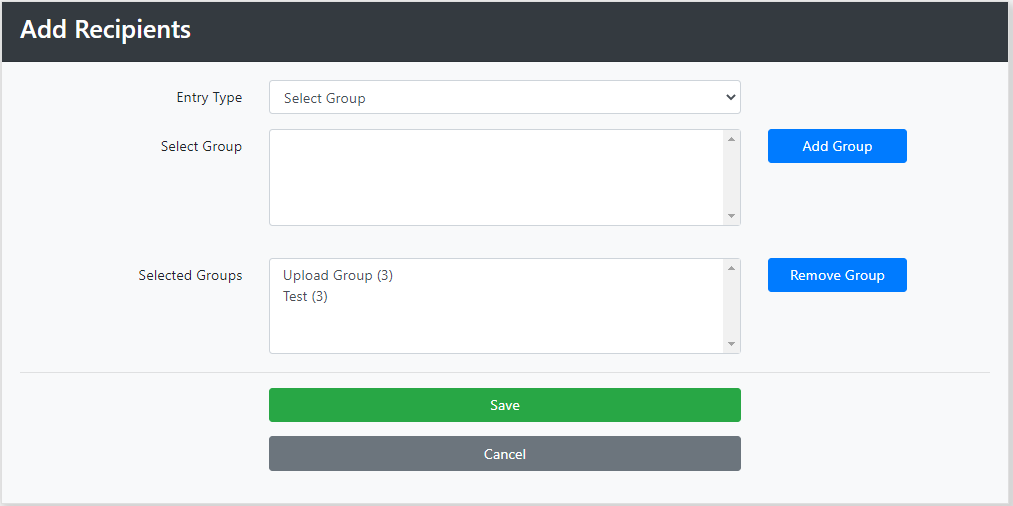
If you wish to remove one of your selected groups highlight the group and click Remove Group.
Select Save
Using Templates
Templates are useful tools for saving standard messages that you use regularly.
You can also use Templates to personalise messages.
From the main menu Select Message Template
Give the Template a Name, and define the Message Originator. (If the message originator is changed here it will overwrite the Originator that was setup when your Account was opened. If you don't need to change the originator leave this field blank)
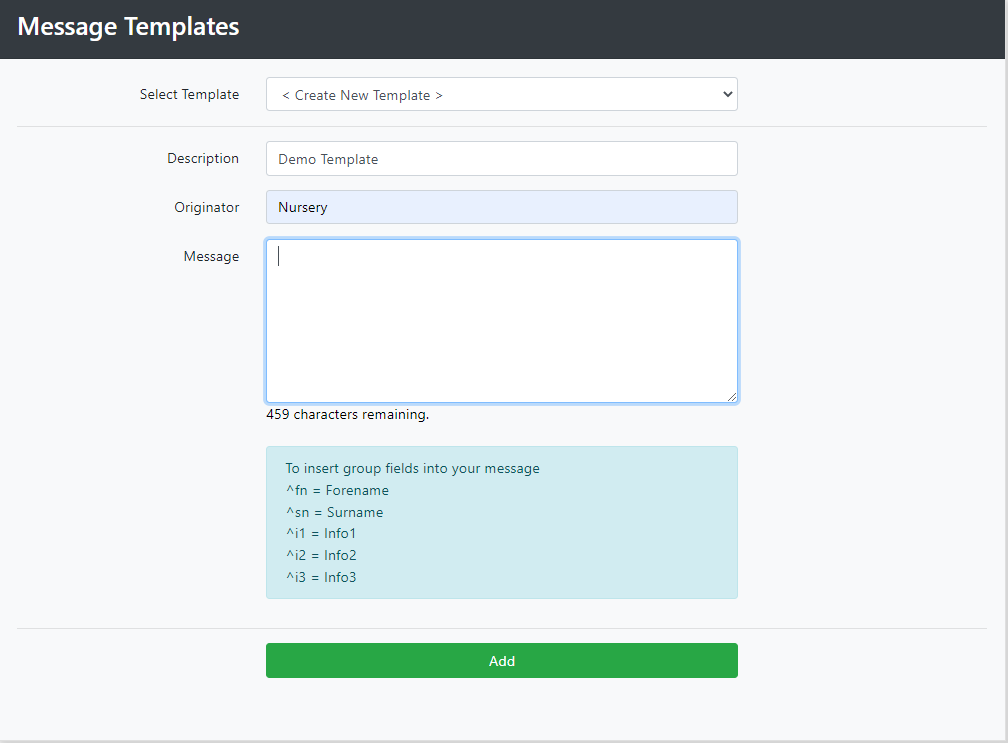
Write your Template and click Add.
You can also personalise your messages using Templates by using Group Fields.
To use personalised messages there needs to be data in the fields as below.

You can also complete the surname and other fields, though generally the Forename is the most used field.
Create a new template and set the Originator as detailed above.
For this demonstration we are going to create a Template which advises that the School/Nursery will be closed on a specific day. We are also going to personalise the message by adding the recipients forename.
We will use this test template: "Dear ^fn the School will be closed tomorrow. Many thanks."
^fn will insert the forename from the SMS database on the system.
The message will appear on the recipients mobile as "Dear Rod the School will be closed tomorrow. Many thanks."
The full list of the codes are:
^fn = Forename
^sn = Surname
^i1 = Info1
^i2 = Info2
^i3 = Info3
Note that the relevant fields need to be populated in the SMS Group Database
We will now send a message to a group using a Template.
First compose message
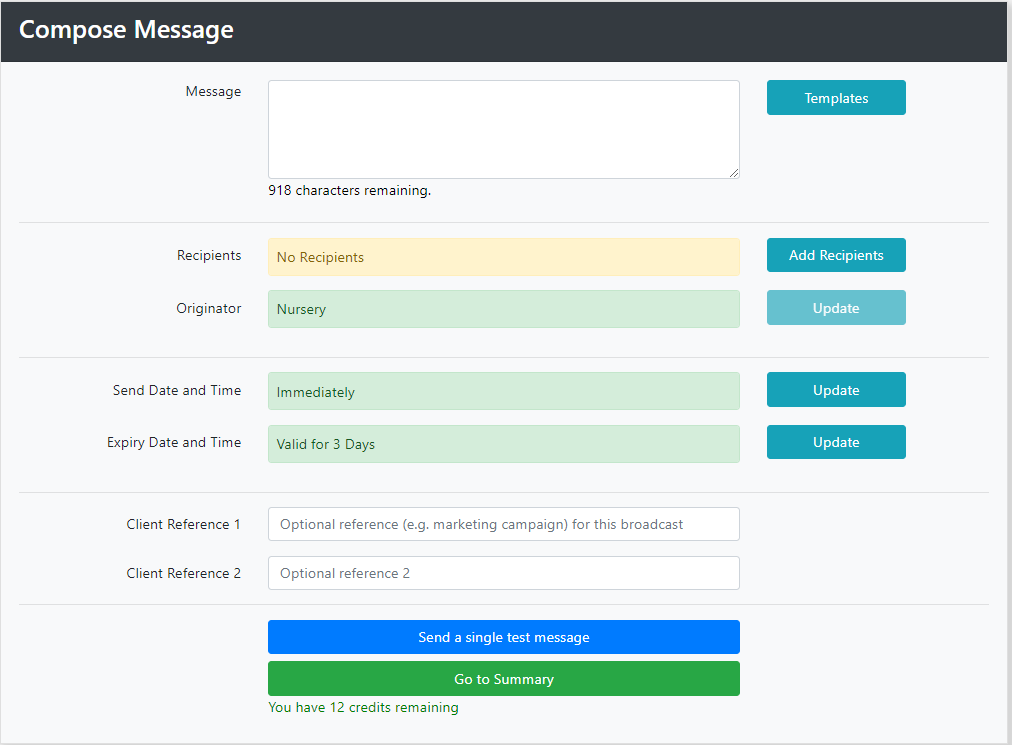
Click the Blue Template Button and choose your Template from the drop down list/
Then click Add Recipients and select the Group you wish to add.
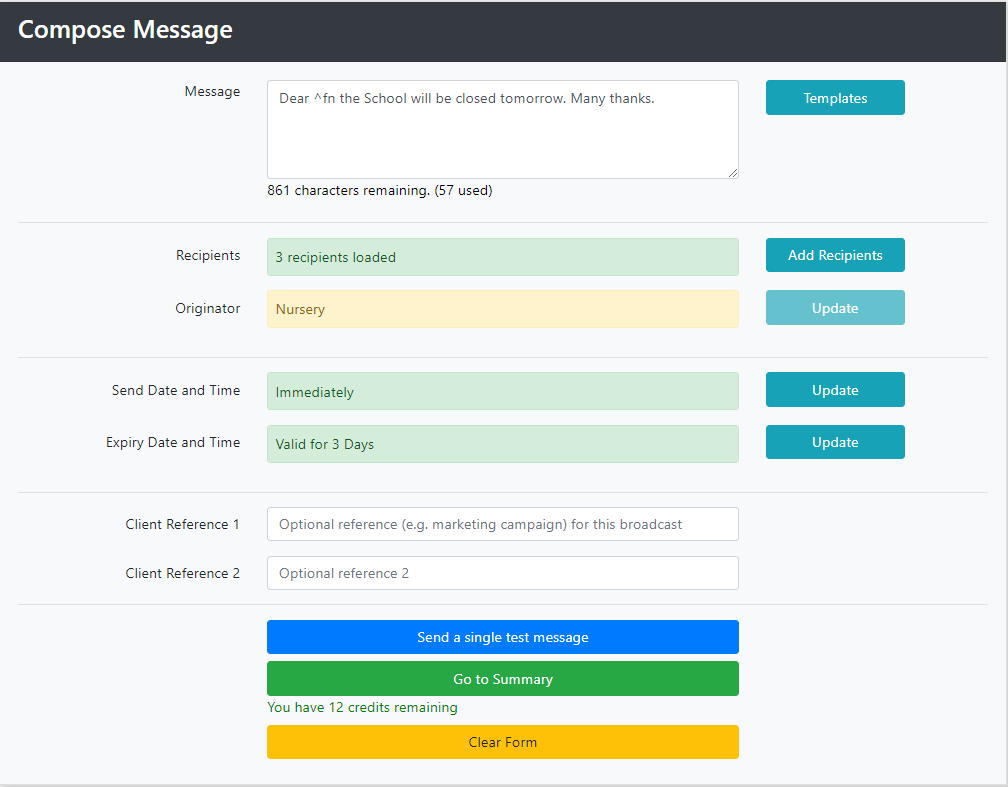
Click Go to Summary and send the message as detailed above.