Payment Line Transaction Reports

Active Pay has in depth reporting of Transactions.
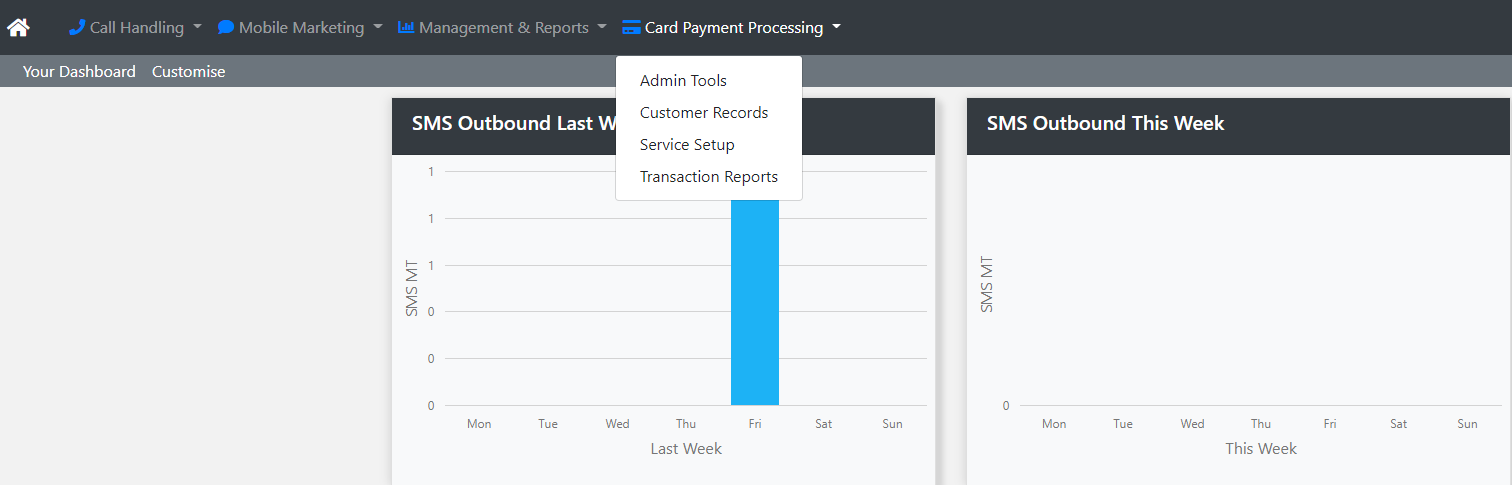
From the main menu select Card Payment Processing
Then from the menu select Transaction Reports.
You now have 4 options on the Transaction Report Menu.
Report: This is the standard report for Transactions
Search: This option enables to you search transaction given certain criteria.
Automated: With this option reports can be emailed to team members at specific times.
XML Reports: If you have XML reports configured on your payment solution this provides additional reporting.
Report
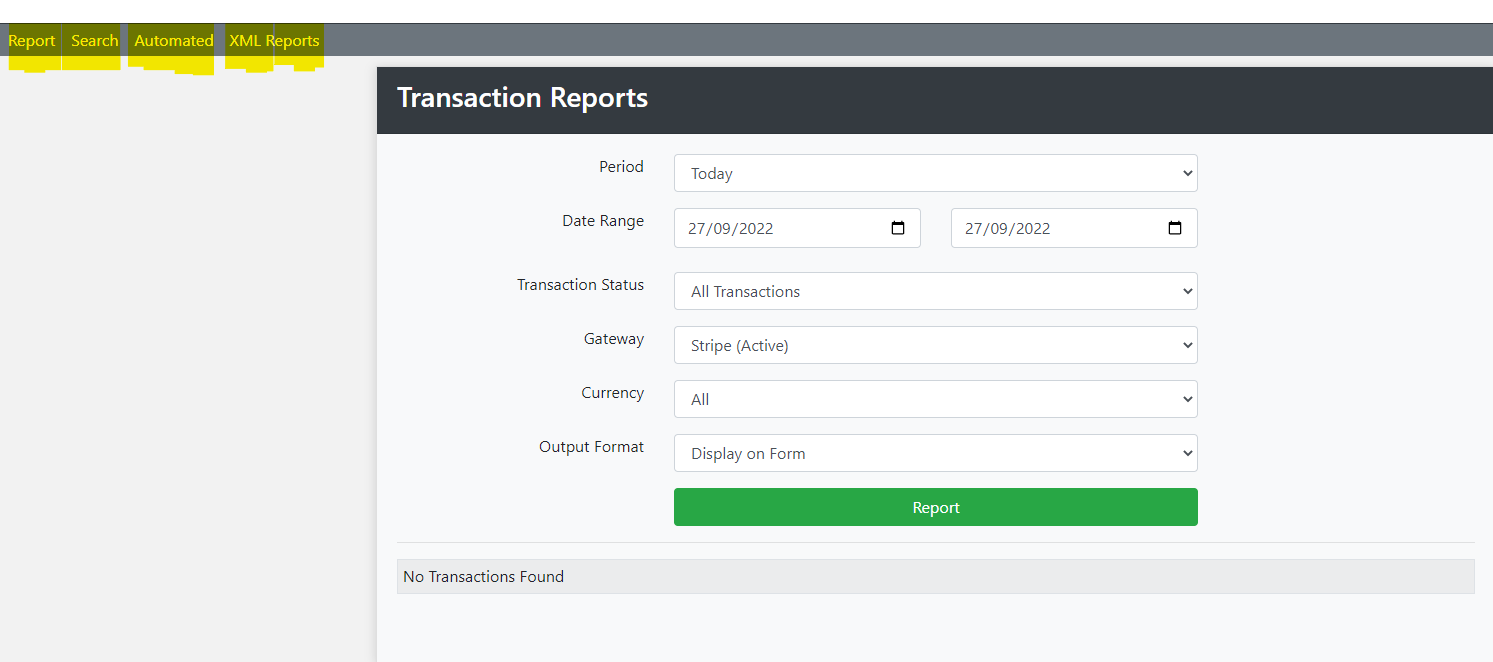
Click on Report
Period: In the period drop down you can select reports for various periods, namely: Today, Yesterday, This Week, Last Week, This Month, Last Month and Custom, where you specify the start date and end date for the report.
Transaction Status: You can search all transactions; Successful transactions and Failed Transactions.
Gateway: Select which Payment Gateway you wish to report on.
Currency: From the drop down report on the currency you use.
Output Format: Choose Display on Form which displays on your PC, or download as an XLS file or CSV file.
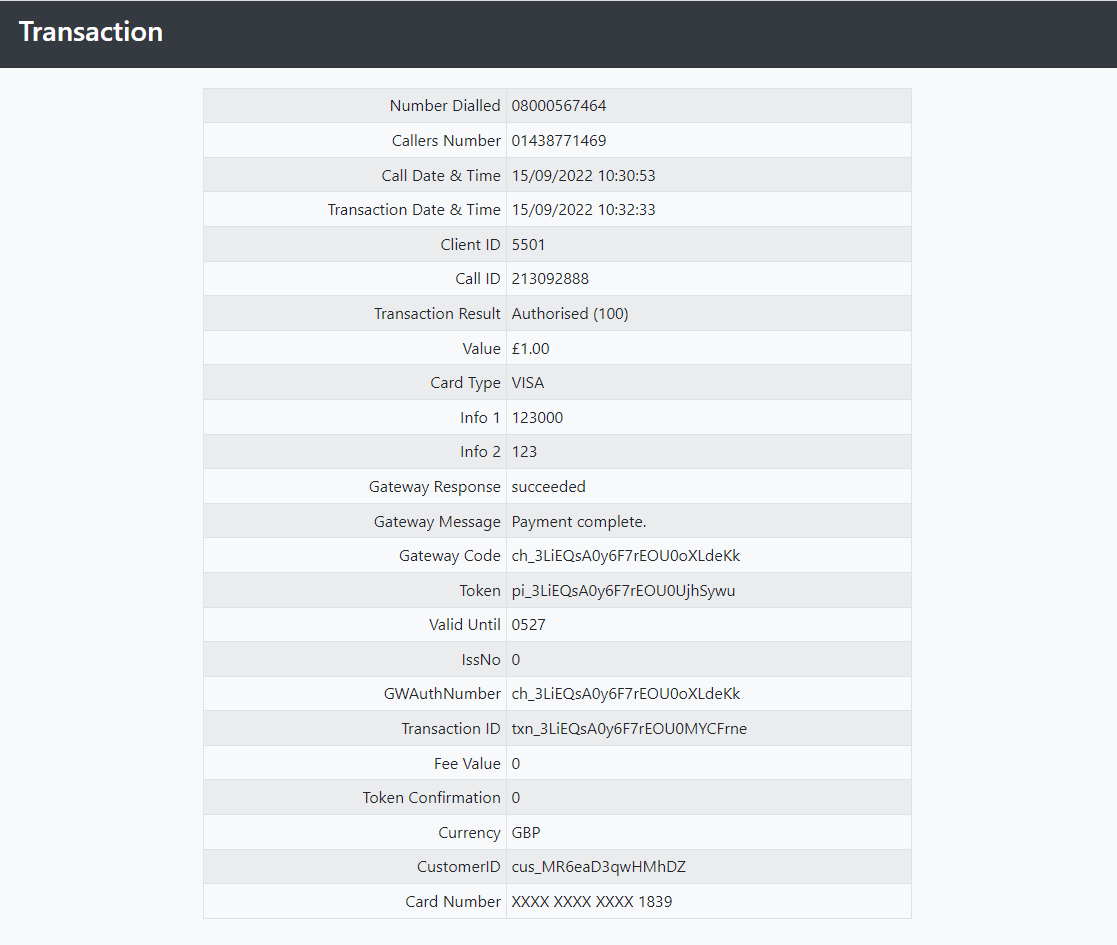
If you display your report on screen you can obtain more details on a specific transaction. Select Report.
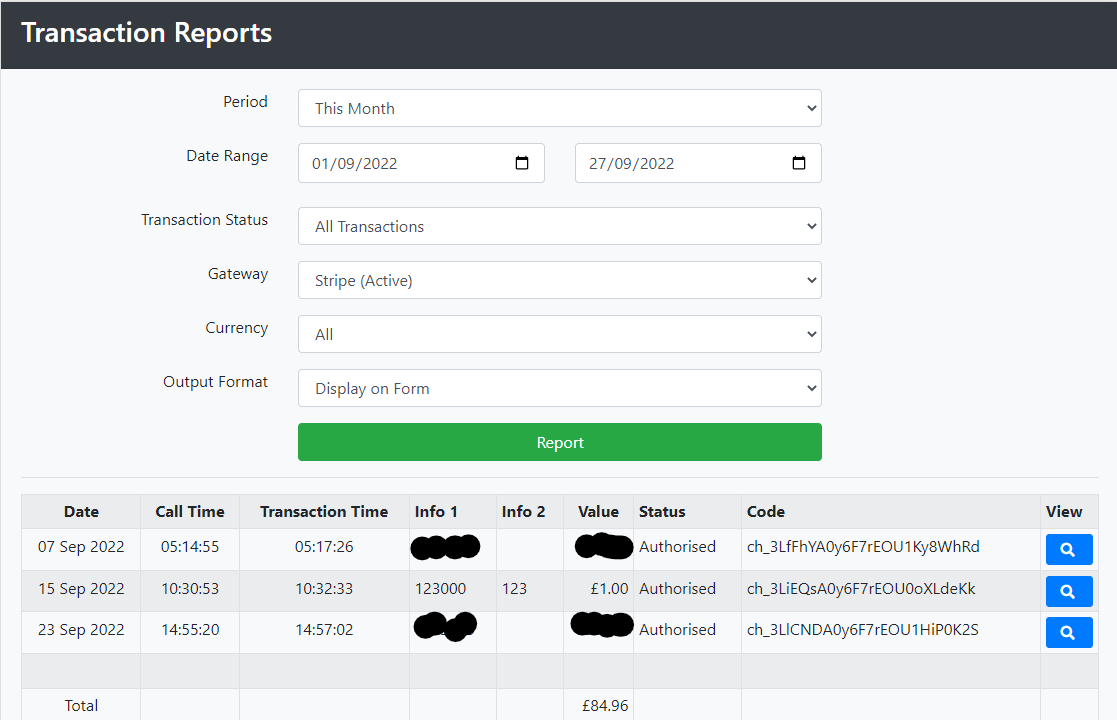
Click on View next to a transaction to view the transaction in detail.
Search
Select Search from the Transaction Report Menu.

You how have several search options.
Period: From the drop down select the period you wish to report on.
Gateway: Select the Gateway/s that you wish to report.
Currency: From the drop down select your chosen currency.
Status: From the drop down you can search all transactions; Successful transactions and Failed Transactions.
Number: You can search on all your payment line numbers; or select a specific number from the drop down.
Payment: You can search based on minimum and maximum payment values.
Card Holder: If you use live agent solutions such as Union, Focus or Collect you can search for the callers name.
Agent ID: If you use live agent solutions such as Union, Focus or Collect you can search based on your Agents ID.
Gateway: Enter the Gateway Response to filter, for example "succeeded" or "declined".
Info Fields: Depending on how your service is setup you can search on Invoice Number, Account Number or whichever form of Caller ID that is set up.
Output Format: You can select Display on Form, XLS or CSV.
Automated
You can create multiple reports which can be emailed out to team members.
Select Automated from the Transaction Report Menu.
You now have some options.
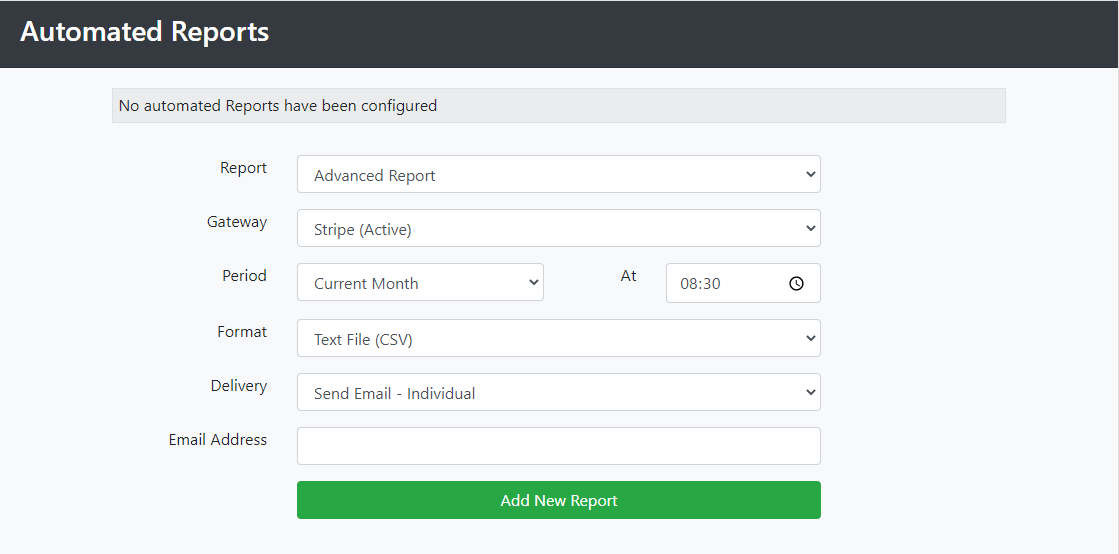
Report: You can select from either Advanced Report or Standard Report.
Gateway: Choose the Gateway you would like to report on from the drop down.
Period: Choose from Current Day; Previous Day; Current Week; Previous Week; Current Month; or Previous Month.
Then enter the time that you would like to receive the report.
Note: if you selected Previous Week you then have the option to select which Day of the Week you would like to receive your report. If you selected Previous Month you have the option to select which day of the month you would like to receive the report.
Format: Select from CSV or XLS.
Delivery: You can select from Send Email - Individual; Send Email - Group (this will be covered further on in this article); or if you have FTP setup, you can select this option.
Email Groups
To create an email group, go to the Card Payment Processing Drop down, and select Admin Tools.
Then select Email Groups

You will presented with this Screen.
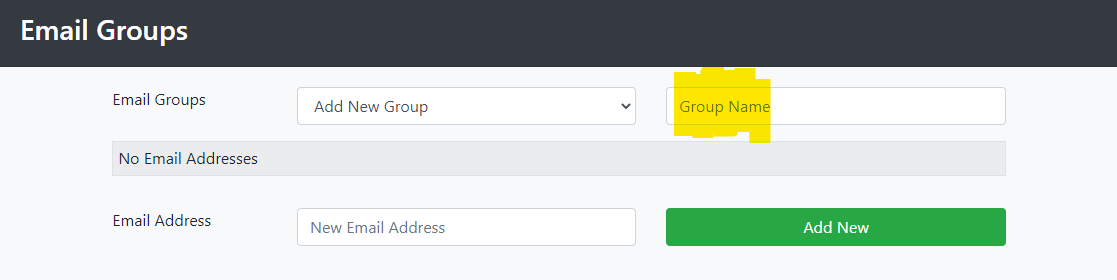
To view your existing Email Groups go to the Add New Group Drop Down.
To create a new Group enter the Group Name. The name must be in email format. It can be a real email address, or you could enter something like this: Demo@teleproject-uk.grp.
Then enter the group members, then click Add New.
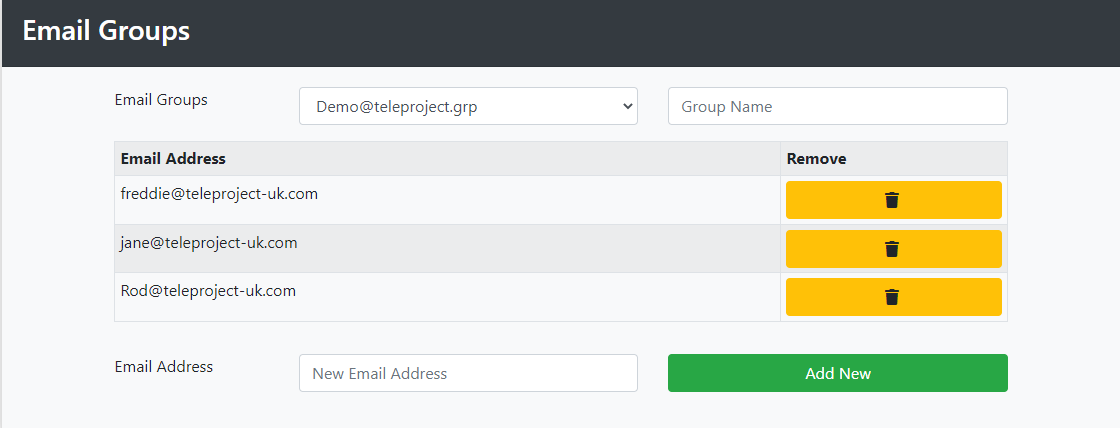
You can add many members to a group.
You can now use the Group in your automated reporting.
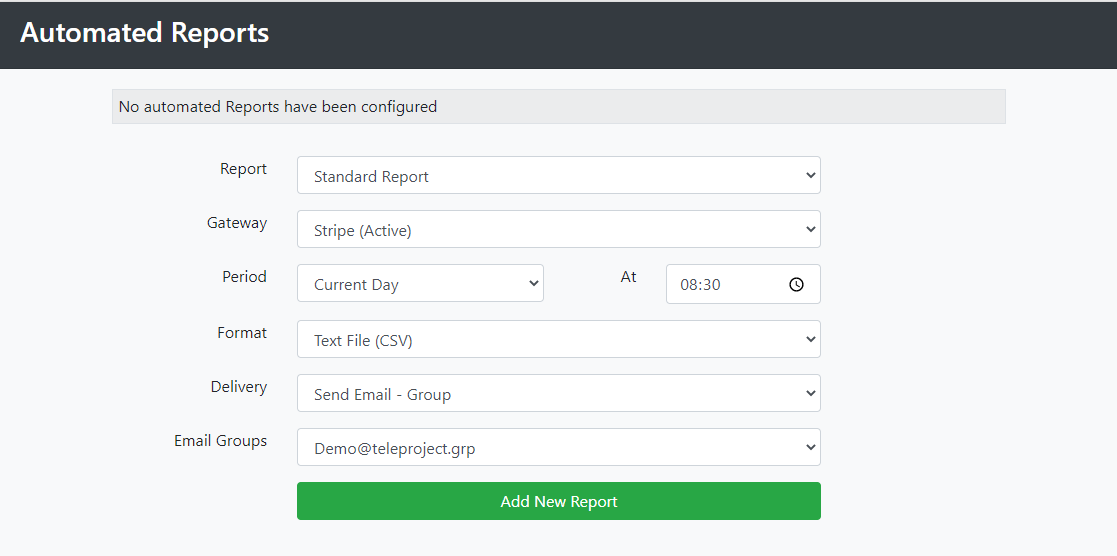
Click Add New Report. You can add multiple automated reports.
XML Reports
If you have XML reports set up on your Payment solution, this option provides additional reporting.
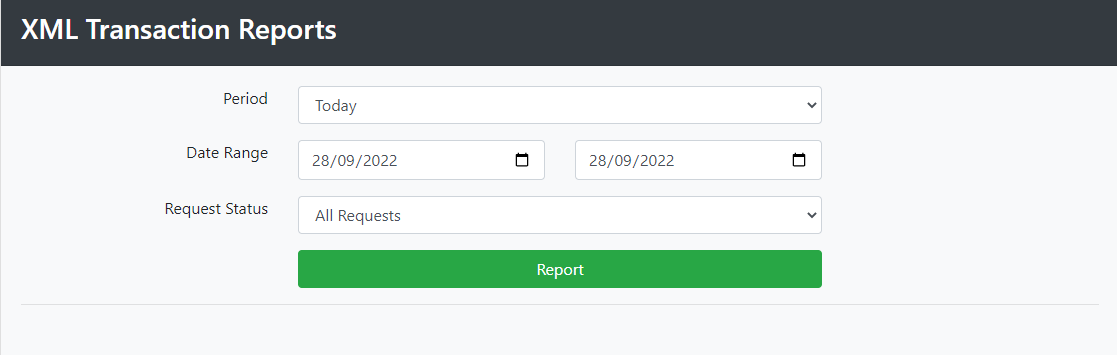
Period: In the period drop down you can select reports for various periods, namely: Today, Yesterday, This Week, Last Week, This Month, Last Month and Custom, where you specify the start date and end date for the report.
Date Range: If you selected Custom, enter the date range you wish to search for.
Request Status: Choose from All Requests, Successful Requests, or Failed Requests.
Click the Green report button to view.
You can then select the View button next to each report to view in more detail.