Queuing - 2. Assigning Numbers

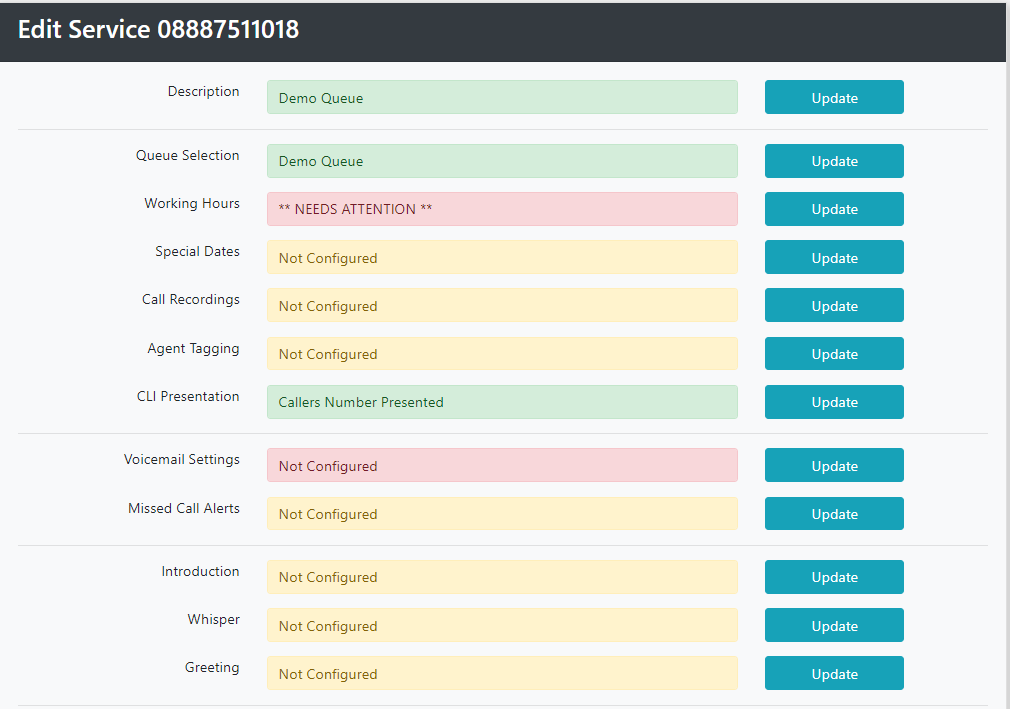
We will now assign numbers to the Queue we built in part 1.
From the Calling Handling menu, select RNP: Queue Manager.
Then Select Numbers

Press the blue Configure Button
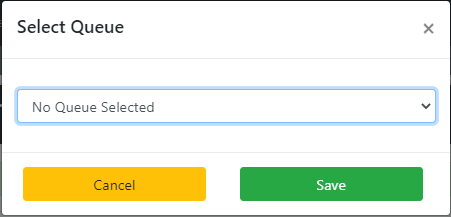
We will select the Queue to add.
Click Update next to Queue Selection, then select the Queue from the drop down.
We will now set the time of day working.

We want this queue to operate 09:00am to 17:00 Monday to Friday.
From the Day Dropdown Select Monday - Friday. Then set From to 09:00 and Until to 17:00

Click Add Record and you can see the setup for the whole week.
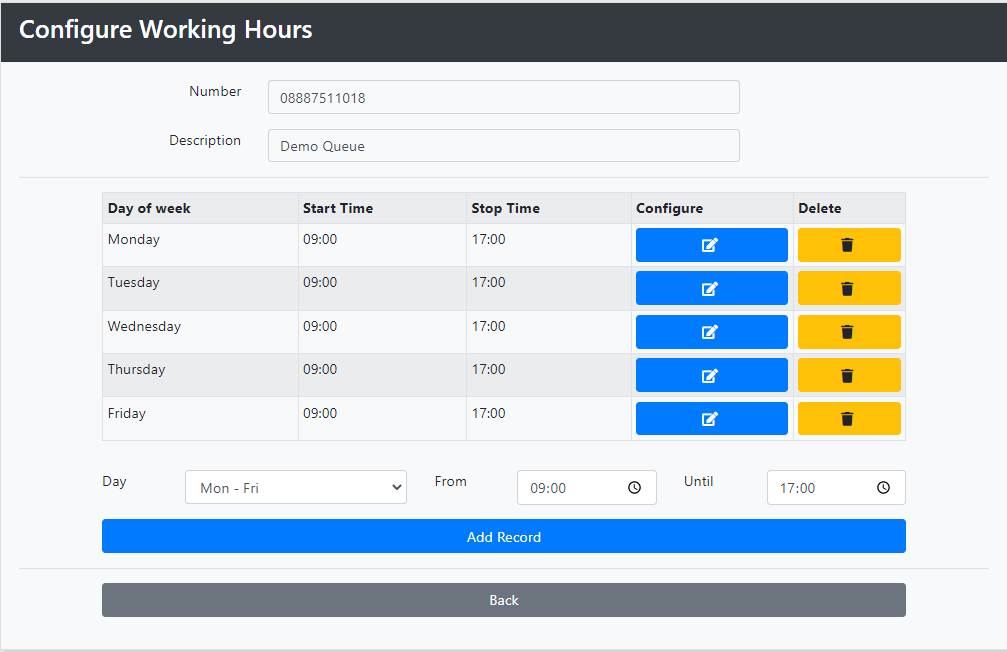
To change a particular day click Configure; or to delete a time click Delete.
Then press the Back Button.
We will now configure the voicemail settings.
Click update next to voicemail settings.
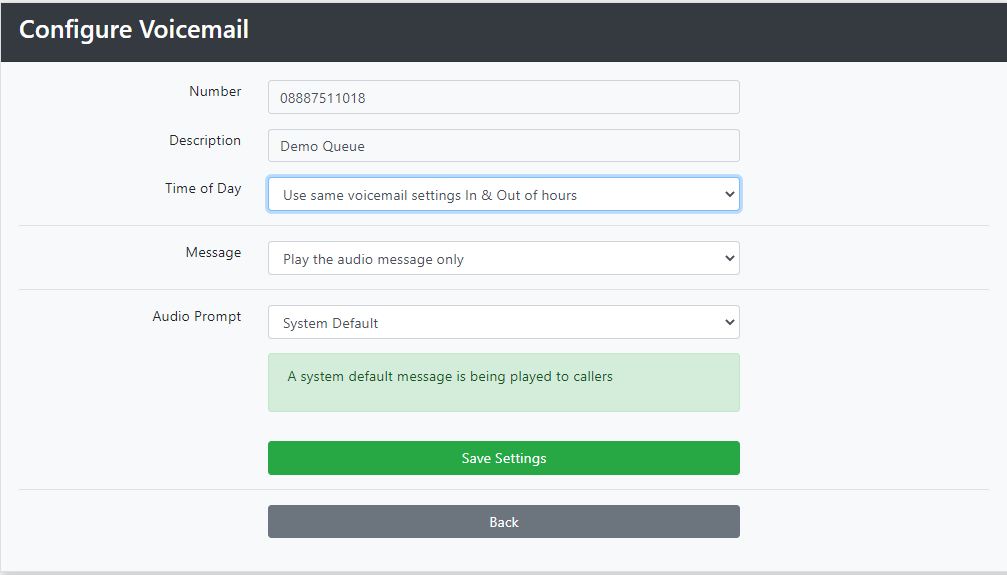
From the Time of Day drop down, choose from one of the following options:
- Use same voicemail settings In and Out of Hours
- Different Voicemail: Out of Hours
- Different Voicemail: Line Busy/Unanswered
Then from the Message Drop select one of these two options:
- Play the Audio Message Only
- Take a Message and email as an attachment.
If you select Take a Message and email as an attachment, you will now need to enter your Email Address.

Next from the Audio Prompt Drop Down select one of the following:
- System Default
- Recorded - Follow the on-screen instructions to record your message over the phone.
- Uploaded - Follow the on-screen instructions to load your Audio File
Click the Green Save button to save your changes.
(Please note if you selected different messages for out of hours and busy/unanswered you will need to repeat this process by amending the Time of Day drop down accordingly.)
To receive notification of missed calls, click Update next to Missed Call Alerts.
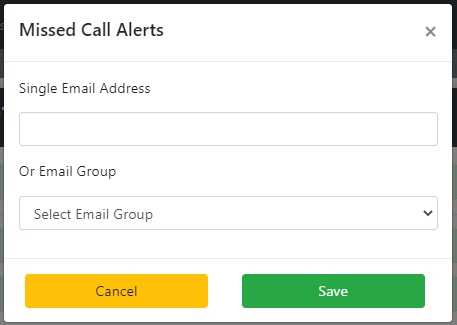
Enter your email address and select Save.
To record or upload an introduction message click Update next to Introduction.
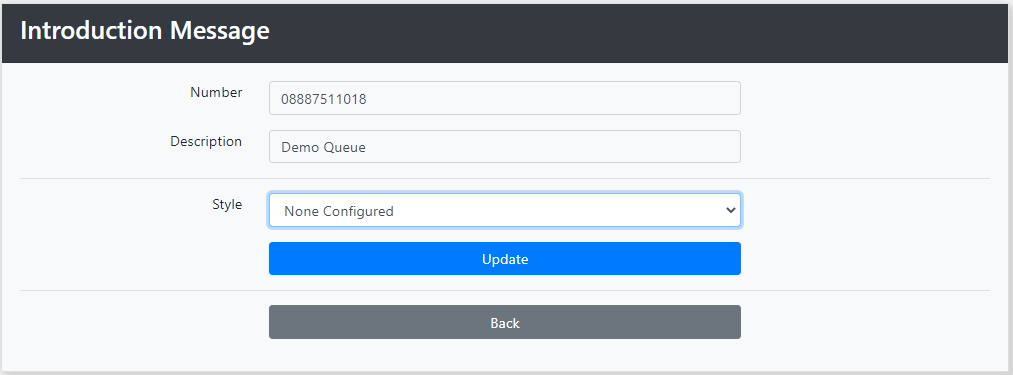
Select one of the following options from the Style Drop Down:
- None Configured - No introduction message
- System Default - Plays out the system message "Thank you for calling, please hold the line whilst we connect your call."
- Recorded - You can record your own greeting. Follow the on-screen instructions if you chose this option.
- Uploaded - Upload your own recording. Follow the on-screen instructions.
When you have made your selection select Update to save.
Finally we will set up the Call Whisper.
(This plays out to the agent receiving the call before connecting to the caller.)
Click update next to Whisper.

Select one of the following options from the Style Drop Down (this is the same process as Introduction, above.):
- None Configured - No introduction message
- System Default - Plays out the system message "Thank you for calling, please hold the line whilst we connect your call."
- Recorded - You can record your own greeting. Follow the on-screen instructions if you chose this option.
- Uploaded - Upload your own recording. Follow the on-screen instructions.
Once you have configured your Whisper select Update to Save your changes.
Active Inbound from Teleproject UK