Account Management

If you have a Master Account, Active Inbound from Teleproject UK, enables you to create and delete Sub Accounts.
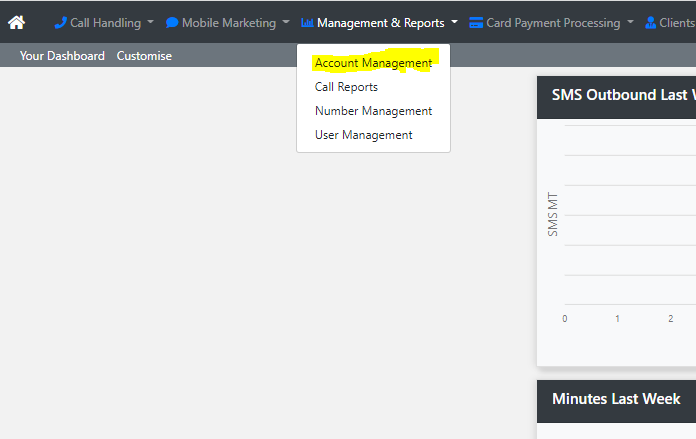
Go to Management & Reports and select Account Management.
You will then be presented with a list of your Sub Accounts.
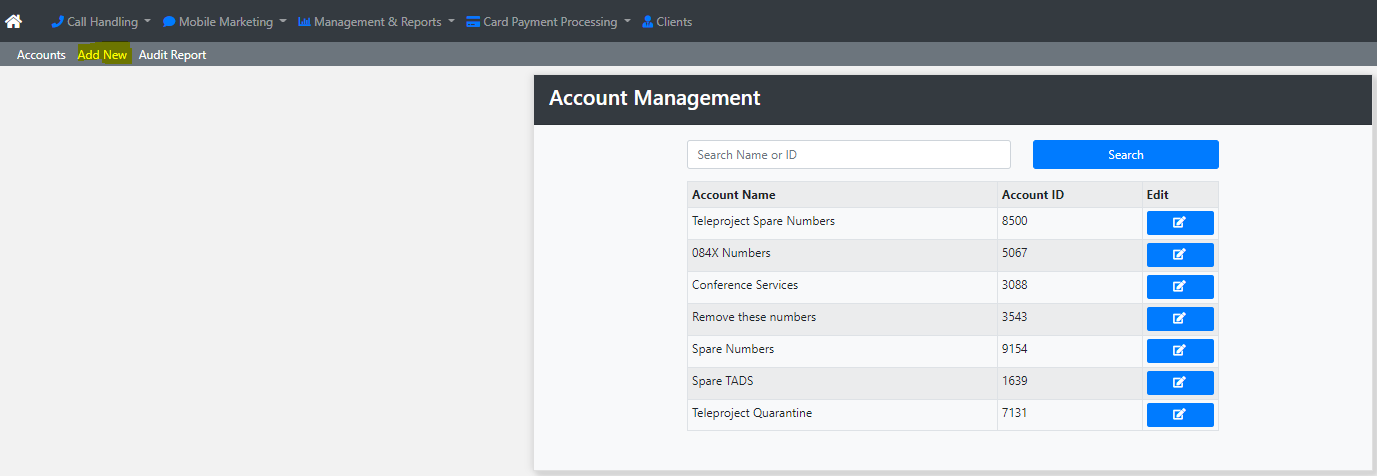
To Add an Account select Add New in the top right menu.

Give the new Account a name and click Add New Account.
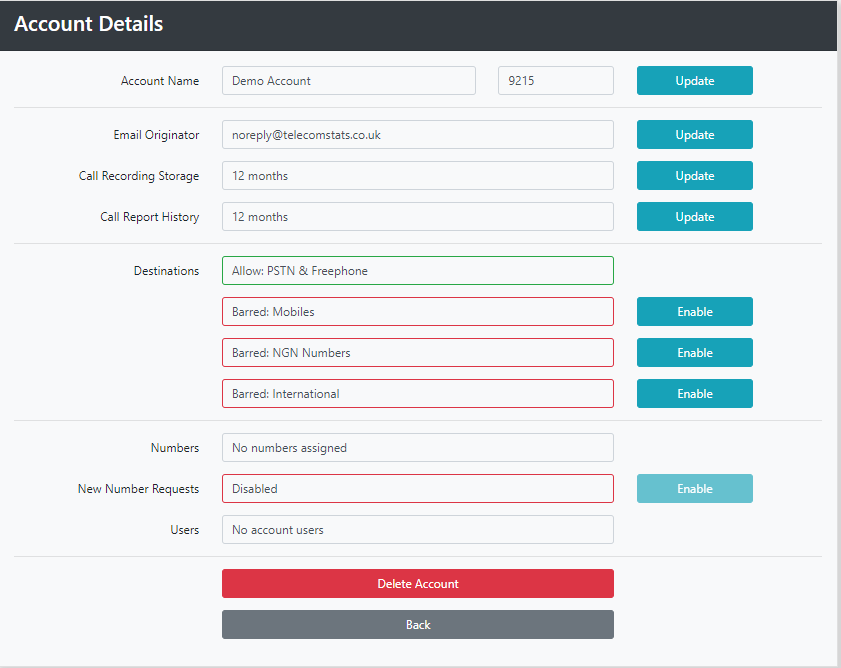
You now have several options. These changes affects every Active Inbound number in the Sub Account.
Account Name - You can change the Account name by clicking update.
Email Originator - This is the email address that system emails are sent from, for example Voicemails and Missed Call Alerts. You can either use one of your own email address or the system default address.
Call Recording Storage - If you have have Call Recording enabled click update to select storage duration.
Call Report History - Click update to select the period you wish call reports to be available. The default is 12 months.
Destinations - This determines which destinations the numbers in your Account can have. The default it UK PSTN and Freephone destinations.
To enable mobile destinations click enable.
To enable NGN destinations click enable.
International Destinations are barred by default and cannot be changed. If you require an international destination please contact your account manager.
To Delete a Sub Account close the services on the numbers in that Account, and move the numbers to another account.
(See Number Manager) Then click Delete Account to remove the account.
The next stage is to assign users to your new Account.
See also: