SMS Appointments User Guide

SMS Appointments is the latest edition to our SMS Solutions portfolio. SMS Appointments sole function is to provide a simple solution for confirming a customer appointment whilst at the same time scheduling a reminder text message to reduce ‘no shows’. Flexible by design SMS Appointments can be used by businesses across many sectors.
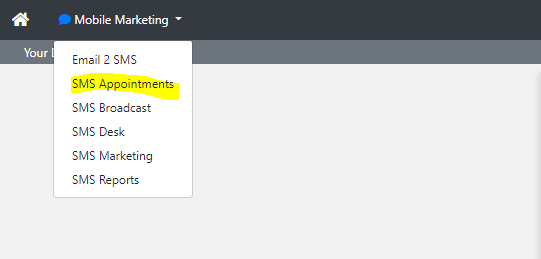
Login to your Active Inbound Account and Select SMS Appointments from the Mobile Marketing drop down.
Firstly we will need to setup the service. Click Setup from the menu.
Click Appointment Template Settings.

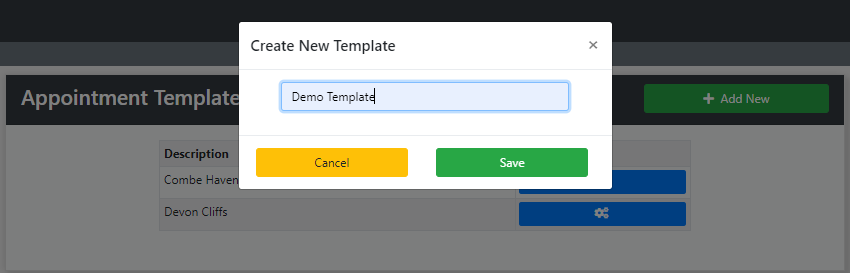
Click Add New and give the Template a Name and then press Save
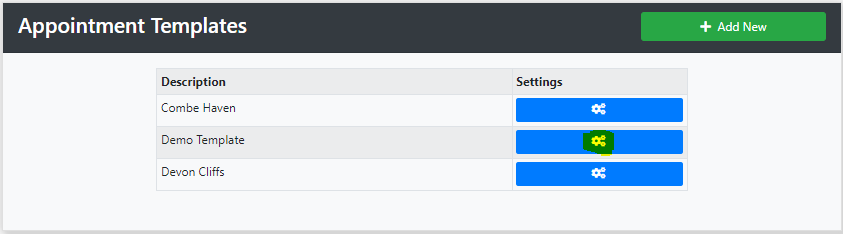
Click Settings next to Demo Template
We can now configure outgoing messages and other settings. Click update next to each option.
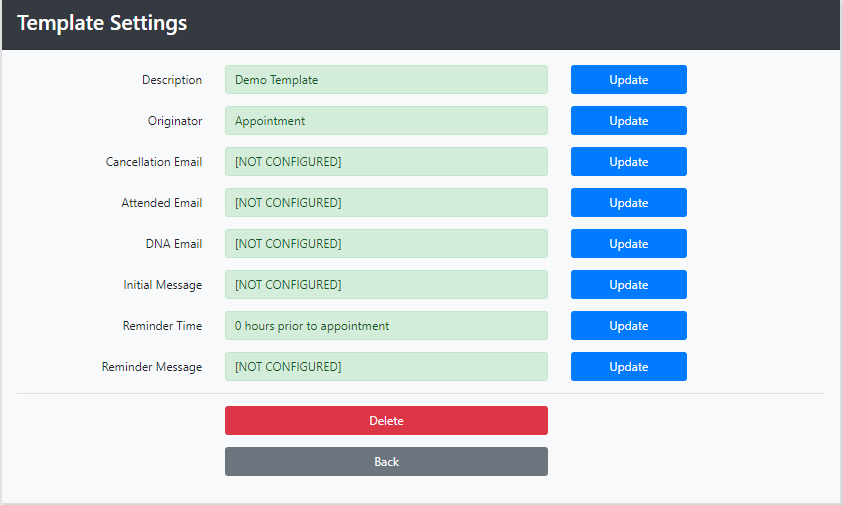
Description - This will change the name of the Template.
Originator - This determines how the message appears on the recipients mobile. This could be the company name, or a virtual mobile number. The number of characters/numbers must not exceed 11. (If you need a virtual mobile number please contact your Account Manager.)
Cancellation Email - enter the email address where you would like notifications of cancellations sent.
Attended Email - enter the email address where you would like notifications of attendees sent.
DNA Email - enter the email address where you would like notifications of DNA (Did not arrive) sent.
Initial Message and Reminder Message automated text messages that the system sends out. These use the Mail Merge function which enables the messages to be personalised.
An example is: "Hi [FIRST] your appointment with Demo Company at our Kent Office on [DATE] at [TIME] is confirmed. If you need to re-schedule, please call 01234 567890"
The mail merge functions are indicated by the brackets; and this information is pulled from.
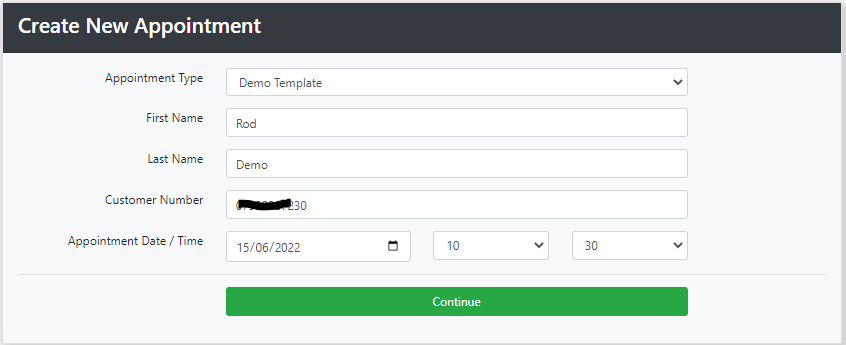
We will now create an appointment.
From the Mobile Marketing menu select New Appointment
Complete the fields and press Continue
You will now see the Appointment Message, and the Reminder message.
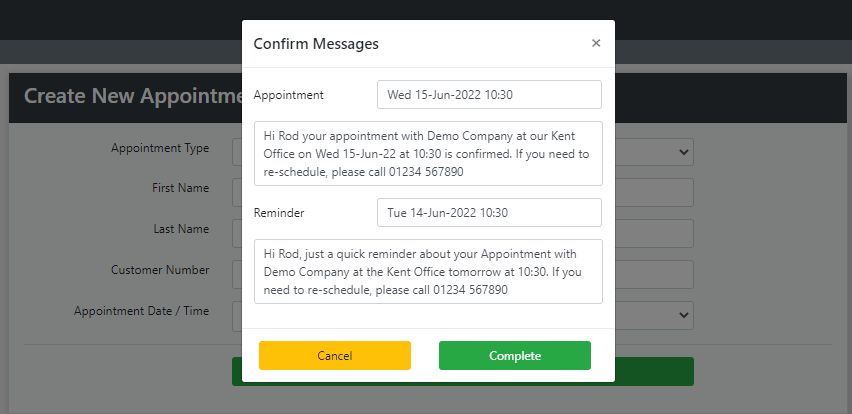
Press complete to save the appointment and this will send the appointment message; and schedule the reminder message
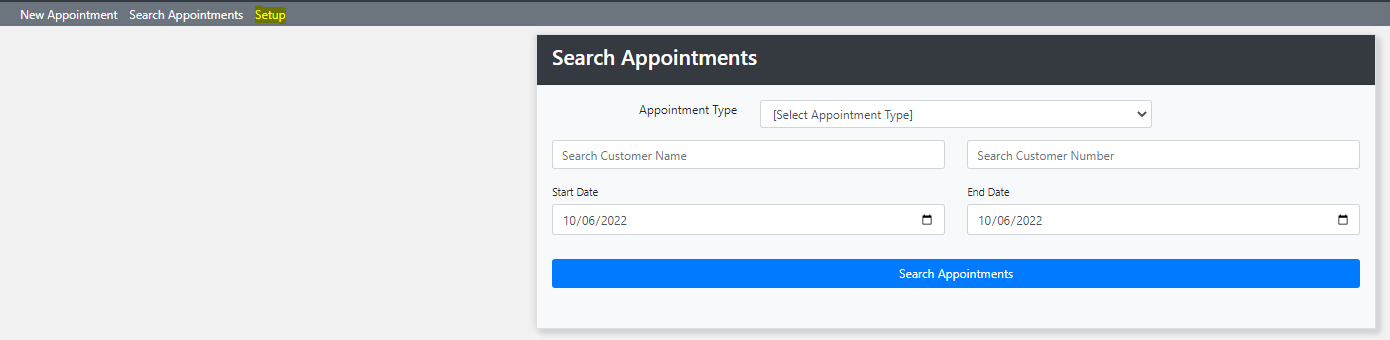
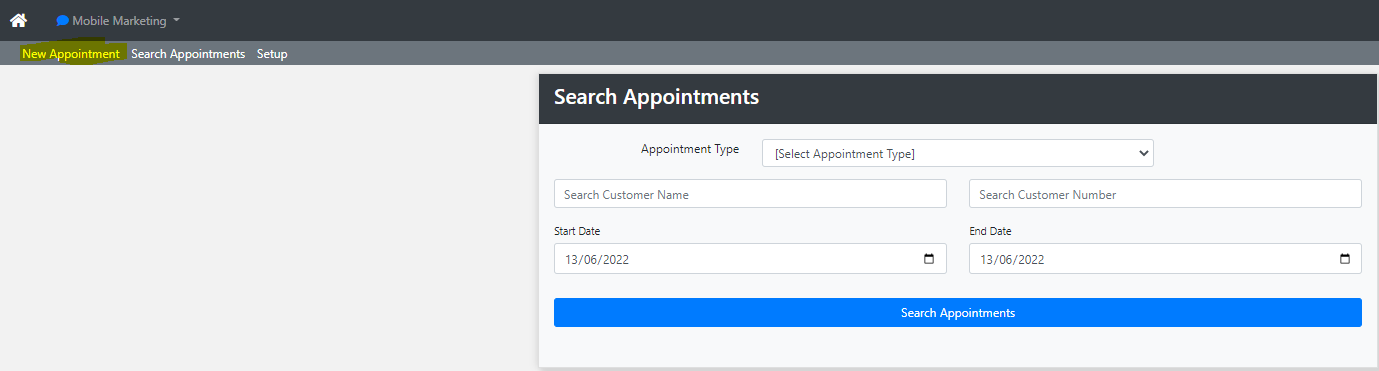
From the Mobile Marketing Menu Select Search Appointments.
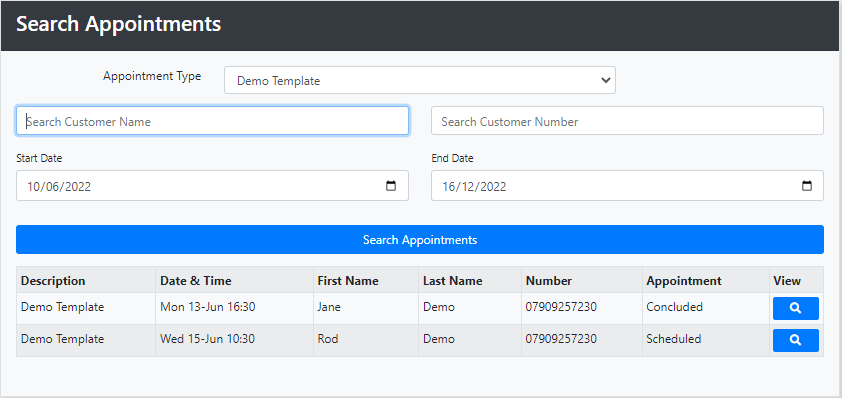
Click view next to the relevant appointment.
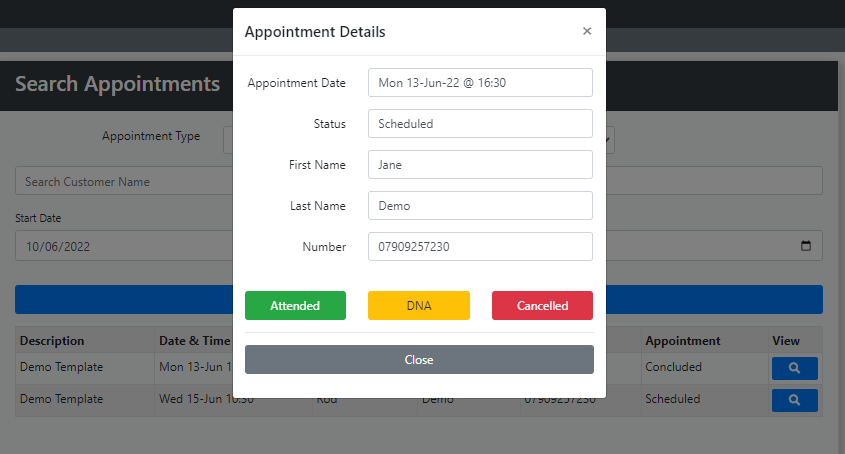
Click either Attended, DNA or Cancelled as applicable. This will generate the email as detailed above.
To setup Appointment Menu Items for Mail Merging, select Mobile Marketing - Setup - Appointment Menu Items.
Then select the service you wish to edit.

Select Add New

Now enter the Menu Items and press Save.
This could be a list of Doctors, or a list of Garages, or whatever you like.
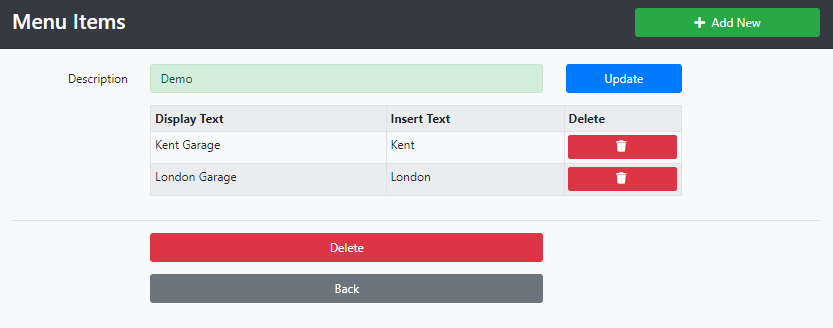
You can now use these fields in your Mail Merging for messages.